StitchArtist: Adding to the Quilting
In my first post about the amazing StitchArtist 3 software I shared how I created the outer swirls of this design. If you would like to read that post click here.


When I finished I decided that this design clamored for something more intricate. What better way to learn the tools of SA3? Hence, the center grid began!
First I needed to draw the shape. Since there is no graphic to give me help, I went straight to the to the DRAW tools and selected DRAW WITH BEZIER NODES. Once you get used to this type of drawing it is much easier than simply inserting nodes!

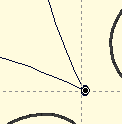
I simply clicked at the approximate place I thought I wanted my outline; looks really bad, right?

The last point (upper left corner) was inserted on top of the first node I inserted. But, to fill this, I need a closed shape. With the nodes highlighted, from the DRAW tools, select the CLOSE/OPEN OUTLINE tool.

I can now adjust my lines to create the shape I truly want. Using BEZIER streamlined the process tremendously! But first, I must tell the software what I am going to do.
First I selected the line from the objects menu. Then from the DRAW tools, I selected the EDIT : BEZIER.... tool.

Zoom into the node to change and click on it. There are now "handles" one to the right and one to the left. These give shape to the segment of line between nodes. I used my grid so that I could duplicate the effect at all of the points centered on the line. In this case, I stretched the handles, keeping the dashed line parallel and ending on the grid line (set at 1"). I repeated on each side for a total of 3 more times.

Now for those corners!

In this screen capture, the corner looks rounded; that is not the effect I want! In order to correct that I simply moved the ends of the handles to the NODE. The handles seem to disappear and the corner is sharp and precise. I repeated this process at each corner.

Looking pretty much like I want! It is a little off center, but don't worry about that for now!

The drawing is complete. Now, to set stitches from the SA STITCH tools.

First time fill here and the FREESTANDING OR QUILTED FILL had to be the one! With the line shape selected, I clicked on the indicated tool. Uh oh...

or not?
Beneath the OBJECTS is the stitch specifics (sorry, too many digitizing programs!) Select LACE. Make the following changes:
PATTERN: (arrow down) SINGLE
DENSITY (refers to the proximity of the lines): 8.5
STITCH (refers to the distance between needle penetrations): 2.5
Uncheck diamond

Perfect! Or should I say "brilliantly Embrilliant SA!"

I love sharing my discoveries with you! Thanks for stopping by...until next time!


OH!!!! Awesome! I am going now to dry to duplicate this interior part. I am horrible with bezier so I will be practicing for sure. Love the tip for the corners! Thank you for sharing this and your steps! I really appreciate your time sharing this!
ReplyDeleteI am really praying to get this extra. I have 4D and I went with Embrilliance and now hope to be able to get Stitch Artist. Does Stitch Artist 2 come with one or should I get one first then 2 then if I can 3. How does that work?
ReplyDelete