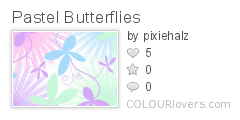
Pastel Butterflies and Colourlovers


It all began here:
(click on picture to link to page)
Colour lovers is an amazing place for digital art! There are thousands of patterns and color combinations for any crafters' heart! By clicking on the Pastel Butterflies image, you should arrive here:
I recommend playing with the buttons! However, in the right hand column you have a selection of pixel options for saving the image. I usually select preview:

Click on the small image and save as. For MTC this works great---the image is square and the patterns are designed to be repeatable. Before going on, there is a great surprise found by scrolling down the page:

Let's make the card!

MTC or related software
Graphic software (PSE, Paint, etc)
Lettering Delights files: Butterlies and Blossoms
Stickles
My Thoughts Exactly Stamps: Easter Greetings
Misc. flower blossoms
Ribbon
Assorted Glues
Cardstock: White for print and cut, colored for card base
Downloadable egg file (see below)
- Open the downloaded butterfly image in your graphic program. I use PSE, but Paint or Infranview will do just fine! It opens really small, but that is okay!

- In PSE, select size: Image. Adjust the values as indicated for use in MTC.(I have had great success using these numbers--I texturize everything! )
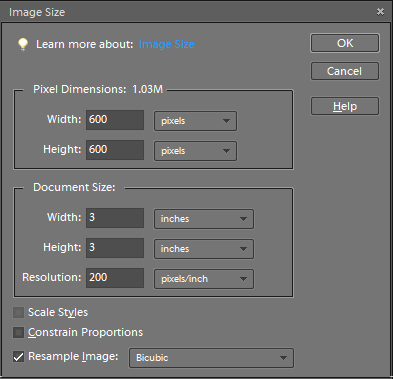
- Save the new graphic in your digital papers file. I name my papers after the designer so that I will know to whom the credit is given! For example, my paper is named "Pixiehatz_butterflies".
- Now, download the basic egg file in one of these two formats.
- Open MTC and the egg file.
- Duplicate the file so that you have three (3) shapes. Arrange them on your mat to be cut from colored cardstock.

- Open a new page within this file. Name it. I find that the pages feature of MTC makes arranging my designs so easy!

- Duplicate for a total of two. Texturize with the paper downloaded from Colourlovers. So prettty!

- Create an "opening" for your egg front.( I used a scalloped circle created earlier and saved to my shapes within MTC.)
- Shadow the circle.

- Move each scalloped circle (opening) to it's own layer.

- And the fun continues....
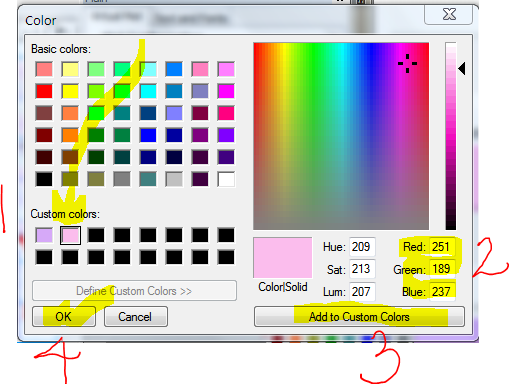
- Copy the RGB values from the design page in Colourloves. This can be done in a number of ways. I find the easiest way is to do a screen capture and save to the same file as my graphic. I can then use multiple windows in my design as you will seen in the following images.
- Select one scalloped circle. Choose "Custom Color" from it's MTC layer.

- Type the desired RGB value in the highlighted box. Select add to Custom Color : OK. The scalloped circle will become that perfectly matched color! Repeat this process for the second scalloped circle.
- For the ornament I used Butterfly 3 from Lettering Delights' Butterflies and Blossoms Collection. I recolored the butterfly with the RGB values from Colourlovers.
- Duplicate the butterfly

- Mirror the duplicate so that it will fit precisely on the back of the first image.

- Rearrange the layers for optimum printing:

- After the butterfly is printed, select the layers for cutting:

- Print all pages that are PNC. Cut all pages and shapes:

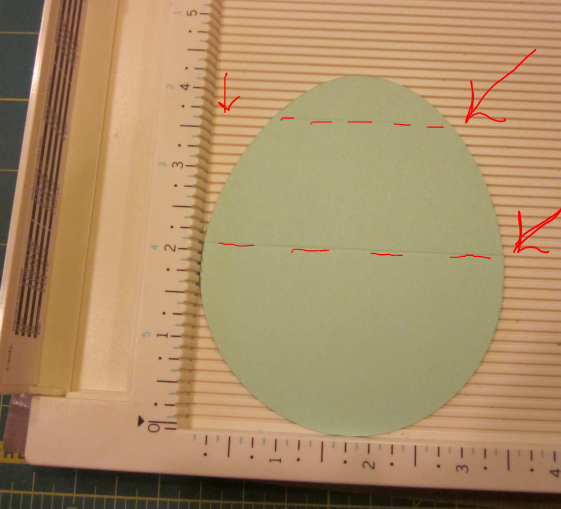
- Choose one of the (green) card stock cuts. This will become your easel. Score the egg in half and 1/2' from the edge:
- Add your layers and embellish! Hint: I added the digital paper egg to the backing prior to gluing the easel to the back. Saved trimming the decorative paper!
I hope you enjoy this new source of digital papers!


Awesome card! Don't you just love MTC, LD and MTE? The sentiment is perfect for your card.
ReplyDeleteTFS!
I do love them all! They make my life so much fun!
ReplyDelete