Digital Stitching in iScrapbook
Hi all! I've been playing around with some of the great features of the iScrapbook application for Mac. Because I quilt, I often add stitching to my scrapbook pages....okay, digital stitching! I'd like to share what I have discovered with you today.
Open the iScrapbook Application. (I'm pretty sure this will work in other scrapbooking programs as well...)


Open the iScrapbook Application. (I'm pretty sure this will work in other scrapbooking programs as well...)
From the left column, choose the plus sign next to the word, "Pages," to add a new page to my album (FBposting). Add a background.
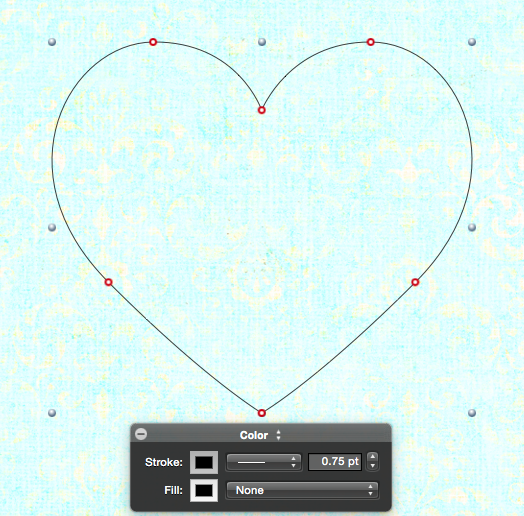
On the right side is the organizer. Select the star and "Elements". I chose the heart. Double click or drag and drop on the background. It will visualize as a black solid line. The next step is to change that!
Select the heart. Click on the down arrow and choose "Color".
Let's make some changes! Select "Stroke" and then click on the dashed line indicated.
Immediately to the left of the line selection box is the width of the line, change this to 2.
Change your color to something pleasing....I like red hearts!
Looking good! Stitching pulls layers of fabric together and gives dimension. To create that effect, I tried using the "Shadows" feature. I played around until I had what gave a reasonable effect to the stitching
Close up, I was pretty pleased!
My high school art teacher would have been really upset if I chose to leave the shadow black! I usually change the color to a darker shade of gray, but that is a personal preference.
Yeah! Faux stitching without lifting a needle! Have fun with this technique! Until next time....
Comments
Post a Comment