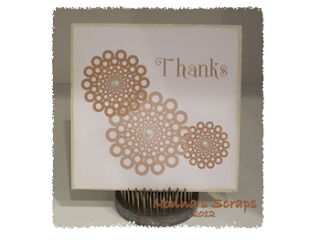
Direct Printing: A Painted Doily
I saw a similar card on one of the many blogs I follow. I humbly apologize that I cannot remember, nor can I find the blog now! So, thank you, whomever for a great idea!
I love the look of layered doilies! This card is yet another in what I have started referring to as "direct printing" onto my card. It is fun, easy and quick! If you are unfamiliar with the process of "direct printing" please refer to my earlier post on this technique.
Make the Cut or similar digital cutting software
Doily cut or the Printed Paper Doily Download (see below)
font: SNF Classy Charm
I Rock heat set tool
Pearl heat set gems
Tim Holtz Distress Ink: Antique Linen
4" Square card base
A home printer
- Download the "Printed Paper Doily"
- Open your software to a new file.
- Add a square from the basic shapes. This will be your mat layer. Size it to 3.8 x 3.8"
- Duplicated the Doily for a total of 3.
- Size the doily as follows: 2", 1.5" and 1".
- Arrange the doilies in a pleasing manner. I preferred this arrangement:
- Color each doily independently.
- Select the Color palette icon.
- From the drop down menu select "Custom Color".
- From the palette, select a pleasing color. Add it to the "Custom color" menu. For each doily, use the same color, but move the slider bar for darker or lighter.
- Add the sentiment with the font of your choice. Color with the darkest shade of your chosen color.
That is the set-up of this card! How easy! Now to print and cut this card....
- Send this design to your home printer. In MTC, be sure that all layers have an "open eye" (or you can visualize the layers.)
- Once the card is printed, the same same design will be sent to the paper cutter. I cut this on my Zing using MTC. I only want to cut the mat---the rest is art! So, I close the "eye" on the doilies and the sentiment. The only visualized layer is the mat. Off to the Zing this goes.
- Ink the edges of the cut mat. Add to the background card.
- Add heat set gems to the center of each doily.
There you have it....fast, fun, done! Thanks for stopping by! I hope you have enjoyed spending a few minutes with me. I've enjoyed talking with you!


I just couldn’t leave your website before saying that I really liked the quality information you offer. Will be back often to check up on new stuff you post ! ! Charity Cartridges Ireland
ReplyDeleteThank you for this tut!!!!!!!!!!!! I had no idea that you could change colors on your print & cuts. This is wonderful. I am going to try this very soon! Great info on this blog!
ReplyDelete