Every artist signs her work.....
Yup, that is what my art teacher in high school, Mrs. Geatches, used to say! And after the label police in my quilt guild have called me on that same issue---I am a believer!
My sweet friend, Josie Janome (15000) actually has a way to help me do this with very little work. And, the best part--it is MY signature.
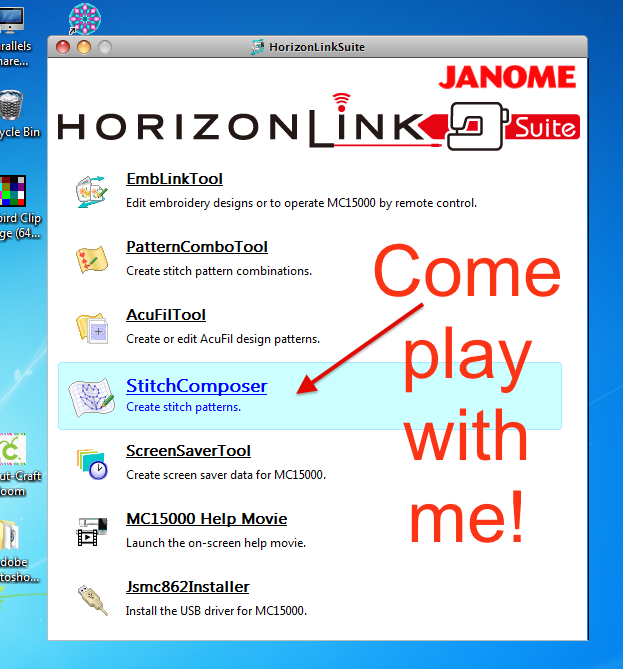
First, let's head to the Horizon Link Suite playground. Select Stitch Composer:


Start adding "points" around the graphic. It is suggested that your points be no closer than 1 mm. Okay, I hear you, "What?!?!?" One millimeter is the size of the square you see. The points in fairly straight areas are easy. To keep rounded areas smooth, insert about 1/2 mm distance from each other. This takes practice and stitch-outs to get right!


My sweet friend, Josie Janome (15000) actually has a way to help me do this with very little work. And, the best part--it is MY signature.
First, let's head to the Horizon Link Suite playground. Select Stitch Composer:
We're not going to stop at the first screen. Instead, we're headed to the "View". Select it from the indicated tab.
Now, choose an image that has minimal detail. For this tut I am using a basic star shape. (To digitize your signature, write it, scan or photograph it and import as the graphic.)
Now, the fun.
- First, size the graphic using the black box handles. The corner handles will size it proportionally. The boxes centered on the gray line will size in one direction only. Remember, the max size is 9mm; it is still pretty small!
- Position the graphic where you want it to stitch in the 9mm field.
- Select the option on the menu bar to "Lock" the graphic in place. (You'll love this feature!)
Return to the first screen by selecting the "Home" tab
Start adding "points" around the graphic. It is suggested that your points be no closer than 1 mm. Okay, I hear you, "What?!?!?" One millimeter is the size of the square you see. The points in fairly straight areas are easy. To keep rounded areas smooth, insert about 1/2 mm distance from each other. This takes practice and stitch-outs to get right!
Got the points where you think they are amazing? If you need to adjust look to the left of the "Finish" button. Select that, click on the points that need to be moved and do the clean up. When finished click on that same button to turn this feature off.
Select finish. This will add your beginning, ending and loop stitches. I have tried to use the little buttons on my own with only disaster. This is so much easier!
It is time to send to the USB and on to the machine! Yeah! Rename if you choose. Send it to the ORD file folder on the USB. If you open the ORD file and see another folder, ORDF, do not worry. You do not need to use this second folder.
Save your work. I always name my first effort with a 1 in the name (ex: jeannie1). Always save where you will remember.....
Walk, don't run to your machine! Stitch your beauty out. How does it look? My first efforts were pretty bad. This is when the reality of 9mm comes home. :-(
You can open your design in the software in order to move stitches around. Simply click on the flower in the upper left corner and select open. Select the saved design you just stitched. You can now move your stitches around so that they are more pleasing. When finished simply write to your USB or save.
There you have it! Now a signature for everything! Enjoy claiming your work!


Interesting. I think it's time to go to the software for my 12000 and take a look at it LOL. It doesn't surprise me that this was posted at 1am either, Jeannie! Hugs! Pat
ReplyDelete