It's a Maker: A "Cathedral Window" Quilt Block
I love the look of the "faux" Cathedral Window block. But, I have never been satisfied when making this block with fabric squares. I have found it difficult to encase the cut edges of the inner block with the "window". Enter Design Space and my Cricut Maker, Mazie....exit with a success!

First, I am so excited to share this Cricut file with you! You can find the file to the quilt block here:
Supplies needed:

Please note--the DS file is for one quilt block, but making more is as easy as changing the quantity when the design has been sent to the mat. Each of the patches for this block are color coded in Design Space to help you identify each of the patches. They correspond to the above photo.
When you open the file you will see this screen:

Let me explain the patches used in each block...


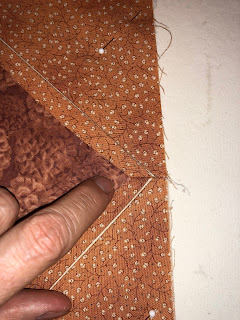
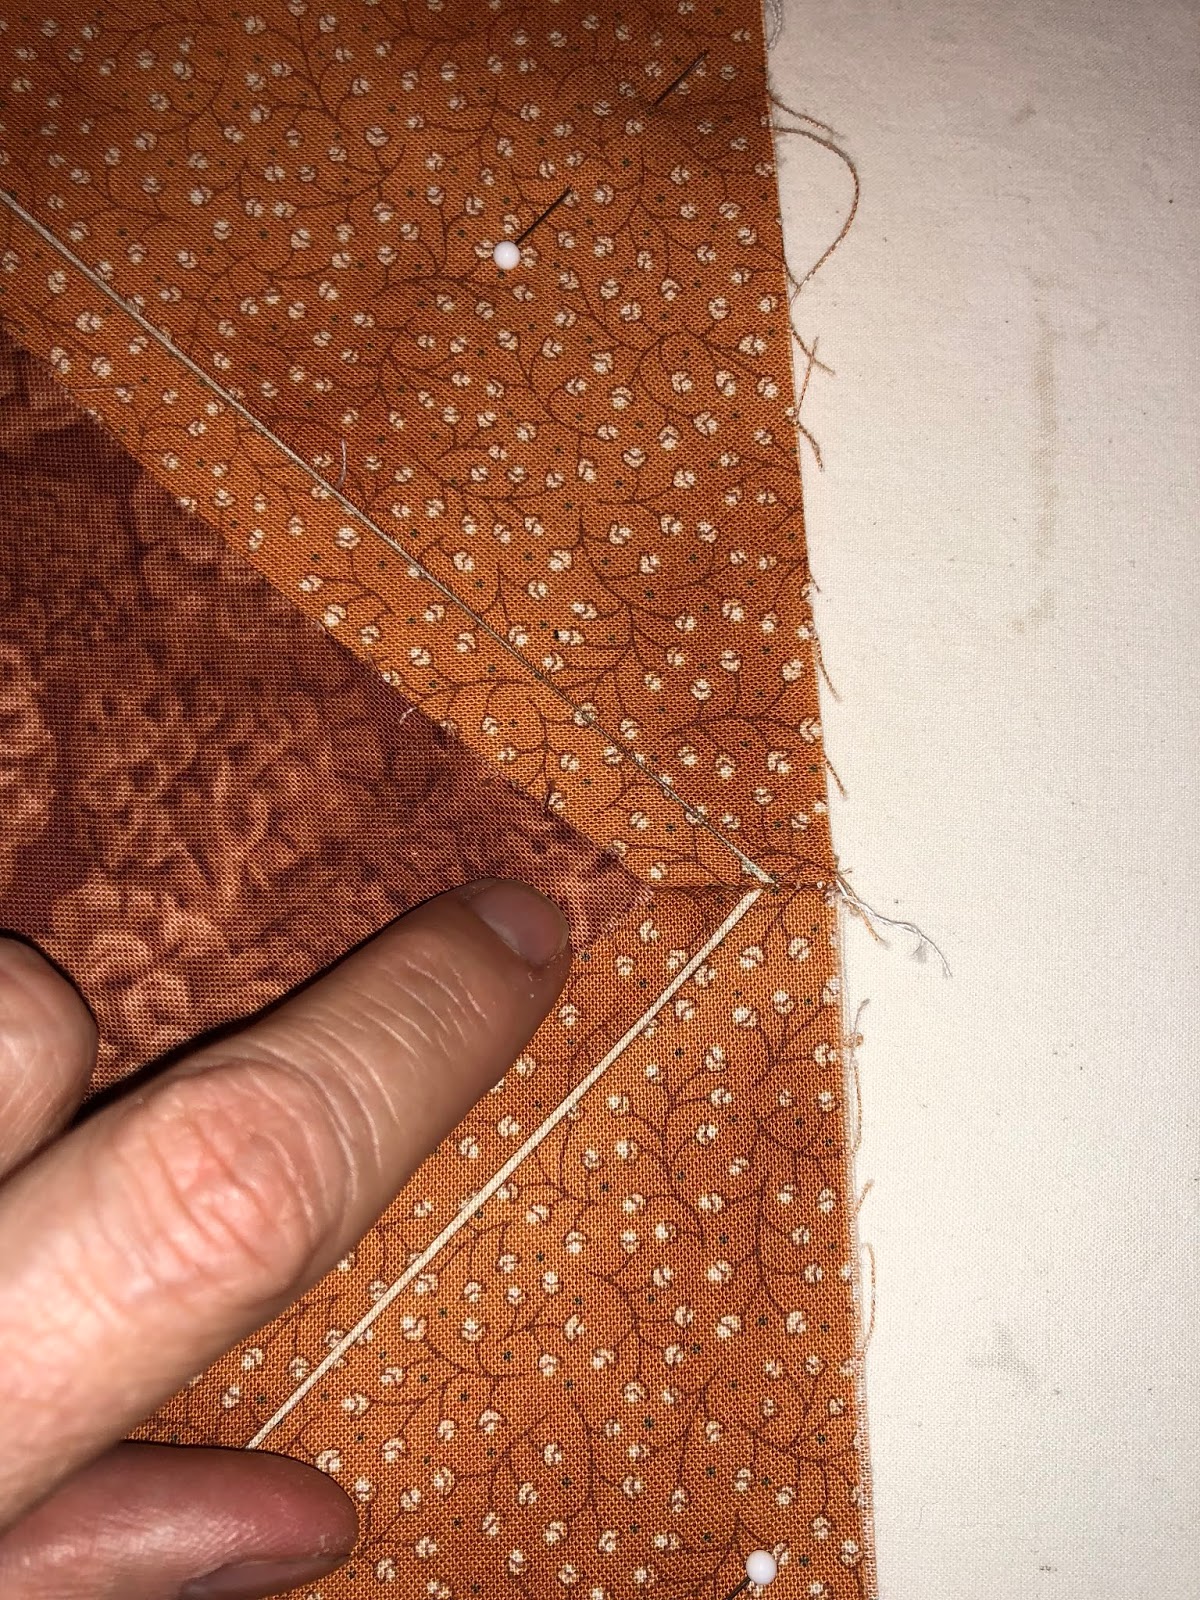
There are many layers of fabric involved in these patches! To help with the bulk I pressed my seam allowances open and flat. First on the back.....


To join the two new units, I placed the two units right side to right side (the pretty side. I matched all seams, the folds and the cut edges. I then stitched along the drawn stitching line creating a perfect 1/4" seam.


First, I am so excited to share this Cricut file with you! You can find the file to the quilt block here:
Supplies needed:
- fabric (amounts listed below for block, additional for sashing or other blocks)
- Cricut pink fabric mat (I prefer the 24")
- Cricut fabric marking pen
- Cricut Maker
- school glue-stick
- Spray starch or sizing
- (optional) pillow form, batting--depends on you!
- Iron, thread, sewing machine

Please note--the DS file is for one quilt block, but making more is as easy as changing the quantity when the design has been sent to the mat. Each of the patches for this block are color coded in Design Space to help you identify each of the patches. They correspond to the above photo.
When you open the file you will see this screen:

Let me explain the patches used in each block...
- The four (4) ecru squares: these are the foundation of the block. There are drawn seam allowances on all four edges; these will be drawn on the back of the fabric. They cut at 4 1/2". On the pictured block, the fabric is the ecru seen in the wedge shape. Amount of fabric needed: 10" x 10" square.
- The dark brown square: this is the decorative center of the window. On the pictured block, this is the dark brown fabric. It's shape helps with placement and creating the window frame. Amount of fabric needed: 6" x 6" square.
- The eight (8) rust squares: these form the corner triangles that allow for the window. There is a diagonal line drawn on the wrong side as a reminder that these will be folded in half. On the pictured block, these are the rust colored fabric in the corners. Amount of fabric needed: 10" x 19"
- The writing in the file is not to be cut, but is a reminder of fabric requirements to make this one block.
On to the block!
Using Design Space and the shared file, I cut all of the pieces with my Cricut Maker, Maizie. Don't forget....you can find the file here:
Using Design Space and the shared file, I cut all of the pieces with my Cricut Maker, Maizie. Don't forget....you can find the file here:

Sorted and stacked, I'm ready to assemble the block.

The first thing I get ready are the 8 rust patches with the diagonal lines.

At the ironing board, I folded the rust patches in half on the diagonal line with the line to the inside. I was sure to match the corner and the cut edges; this is important later. I then pressed, not ironed the fold.

I have discovered that it is very important is to stabilize the fold in order to decrease "wiggling" in later steps. A thin line of Elmer's School Glue-stick along the fold, refold and press lightly did the trick!

I repeated these steps for all of the rust patches, giving me eight triangles.

On to the four ecru foundation patches. At the cutting table, I placed one rust triangle with the fold towards the center of the ecru patch, matching corner to corner as shown and checked that the cut edges were aligned. To insure that the corners of the fold wouldn't move out of position I used glue-stick between the rust corner and the ecru base! (Note the red arrow.)

Next, I placed the second rust triangle with its folded edge next to and not overlapping the first. Again, securing the corners.

So, I am skeptical, so I also pinned securely in place as shown below. And, I repeated for all of the triangles and the foundation squares for a total of 4 units.

Okay, for safety sake, I pinned the cut edges down!

These four patches (units) are ready to sew! I arranged them so that I wouldn't get the folded edges in the wrong position! Note the triangle formed by the folded edges.

And then I stitched the top two units together, on the short side.

And then the bottom two.

There are many layers of fabric involved in these patches! To help with the bulk I pressed my seam allowances open and flat. First on the back.....

then...I flipped the blocks right side up and pressed again. Nice, flat seams!


Again, I pressed the seam allowance open on the back and then pressed from the front to flatten. The perpendicular seam lines are important to finishing this block and creating the window effect.

But, now it is time to add the funny shaped brown patch....
Two things to know about this brown patch. The concave curves indicated in the picture serve as guides for the finishing of the "window". The sharper corner points help to accurately place this patch on the perpendicular seam lines.

After using glue-stick on the sharp corners and the center of the brown patch, position this patch on top of the perpendicular seams.

I used the sharper corners to position the them on top of the four seams of the rust block.
Once the brown patch is positioned I began to create the window effect. To do this I identified the lowest part of the concave curve, approximately at the center of the patch.

At this point, I rolled the folded edge of the rust triangle over the cut edge of the brown patch approximately 1/2", encasing the brown patch. I pinned at the center to secure. My goal: to encase the cut edge of the center patch all around, creating a "window" effect.

How did this happen? First, I found this process easier to accomplish at the ironing board, pressing as I went. Second, the folded edge is a bias edge and is quite stretchy. It allowed itself to be manipulated and rolled in the correct direction. The center of the roll was the widest part and was my stabilizing point. I placed one pin there. I finished the roll first to one side of the pin and then the other, narrowing the roll as it approached the corner of the brown patch. When the very narrow rolled edge covered the corner of the brown patch, I finished the roll by aligning the narrowest part with the exposed perpendicular seam, ending 1/4" from the cut edge of the block. The extended point of the center brown patch helped to insure coverage by the folded edge.

I repeated this on the three successive sides; always beginning at the center and moving away towards the ends. I found that if one narrow end overlapped the first slightly, it is not a problem! I just needed to be sure that the point of the center patch was covered! I pressed well to set the rolls. The narrowed corners should look like this:

With all four edges rolled and pressed, I moved to the sewing machine. Edge-stitching I caught the folded edge in the stitching. My preferred stitch is a very narrow zig-zag using a thin thread like Aurifil. The stitching is almost invisible!

Note: I used white on this sample hoping you would be able to see it!
I began stitching at one corner and proceeded around the "window." The thread tail indicates where I began and ended!

The almost finished square looked like this:

In order to complete the window of this block, finish the outer cut edges by adding fabric strips or additional blocks before stitching the outer part of the window frame. The sewn 1/4" seams help to stabilize and keep the narrow points of the window frame neater. The "oops" at the corner below would not have been so glaring had I sewn strips around the edge!

For sample purposes, please assume that I have done just that so that I can finish the window frame.
The outer window frame was completed in basically the same manner as the inner frame. I measured the inner frame at 1//2"and I wanted consistency in my outer frame. To do that, I measured and folded the outer frame at that width in the center and pinned. The process is exactly the same....center pinned, move outwards towards corners, narrowing as I go, press and stitch!


And that is it! A Maker cut Cathedral Window block ready to be finished in your desired style!

So, I got to thinking what else can I create with this one block?
Rotating the original blocks
and not including the center square.....

Make lots of blocks and create a quilted piece......

And one more.....
Cut more brown center squares
and add them to the marked areas
before the outer frame is stitched down.
Finish the outer frame like it was done earlier.....

A note about creating a quilted piece: Due to the fabric
layers it would be beneficial to use a lighter
weight batting.
In the end, I'm still looking through the "window" of possibilities!
I hope that you enjoy this block and cutting it on the Cricut Maker! Until next time....
Keep sorting those scraps and generating your gems!


Comments
Post a Comment