Kaleidescope Kreator 3 Print and Cut
Hi all! It is great to be back with you. I had surgery last week and am beginning to feel more normal! I have had numerous questions about how to use Kaleidescope Kreations 3 to create print and cut shapes, so today I thought I would share my method.


Design House Digitals : Digital paper--Cherry Limeade
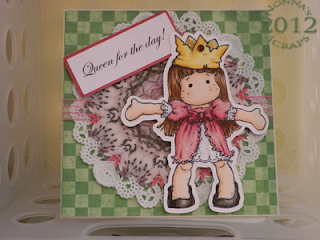
Princess Welcome Tilda Stamp
Copic Markers
a favorite photo
paper doily
Make the Cut or similar software
Zing or similar cutter (capable of print and cut)
- Open KK3 software and choose the template. I chose the Flower 20 design.

- I choose my photo and positioned it behind the KK3 template. The small image to the right previews the kaleidescope.

- Save the Kaleidescope as indicated. Be sure you remember where you save the file!
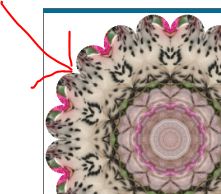
- I saved this as "doggie design (can you guess why?) I really like the way the colors blended!

But, look at the inset edges:
They are white, so tracing this image in MTC will not be satisfactory.
Create a cutting template in KK3.
- I used the same process in KK3, except when it was time to choose the photo, I chose a solid black square.
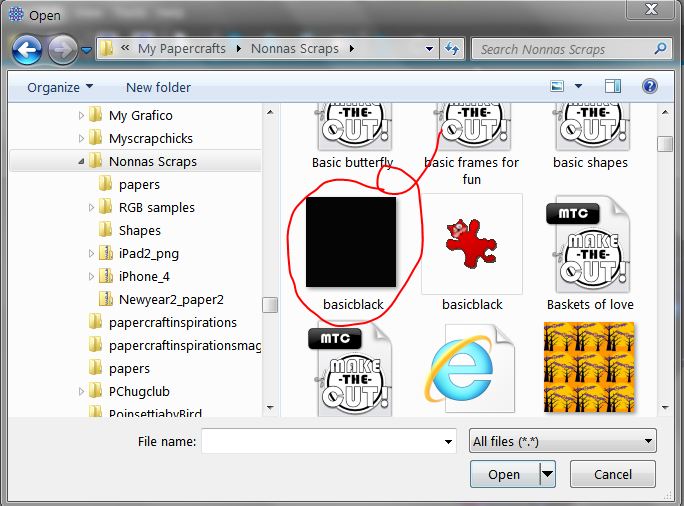
- I saved the solid black kaleidescope as "Flower 20 template." It creates a crisp outline that can now be traced in MTC.

- Import : Pixel trace the black template first. When prompted answer, "no."
- Import : Pixel trace the colored kaleidescope . Note the settings. I did not want a fancy trace on this image. Again, when prompted answer, "no."
- Position the two tracings one atop the other. Right Mouse Click on the background : align : stack. Like magic they are perfectly aligned.


- From the basic shapes, select and add a square. Size it to "surround and bound" the kaleidescopes.
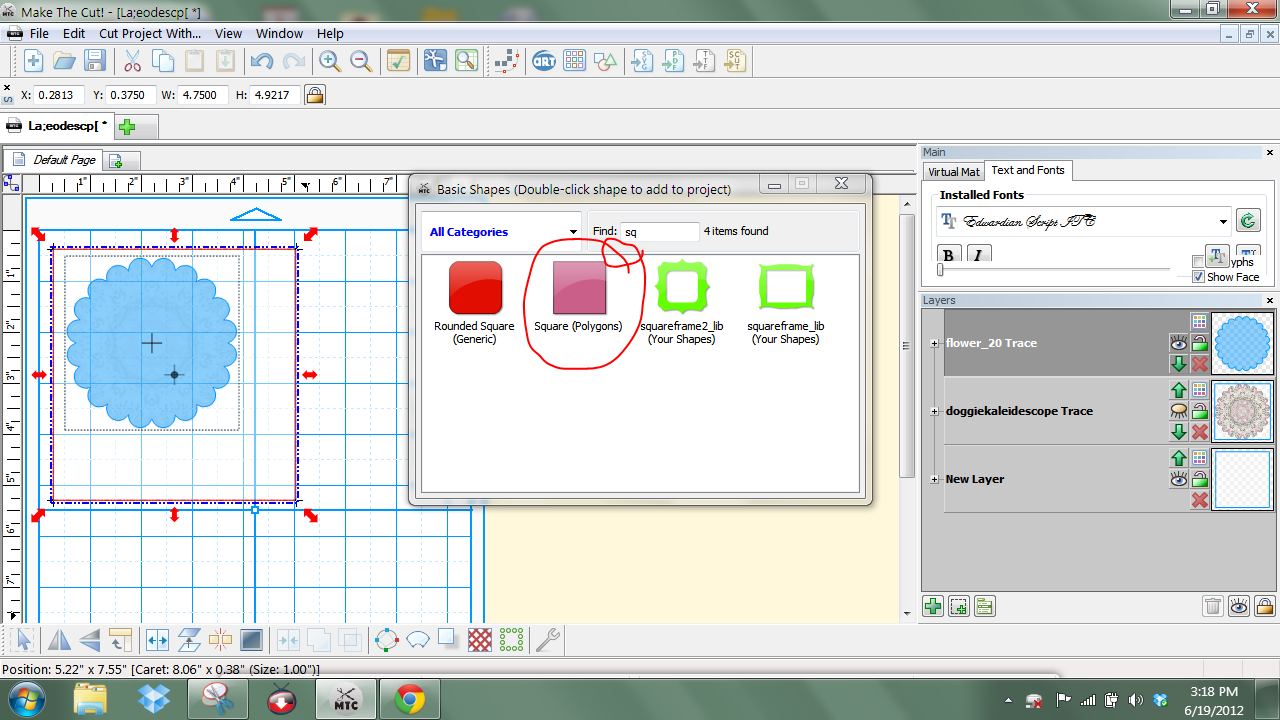
- The "bounding box" determines where the registration marks are. I have found that the two kaleidoscopes (even thought they are supposed to be the same size...) have different positions for the registration marks.

- I then moved the "bounding box" to the bottom layer position. This is important for printing.

- Send the layers to be printed to the printer.

- Mat and cut the appropriate layers.

Voila! A gorgeous kaleidoscope from KK 3 and MTC!
I hope that you have found something helpful today. If you would like the black square to use with your KK 3 creations, here is my gift to you:
Thanks for stopping by!


Awesome project!
ReplyDeleteLook at you go so soon after surgery. I love the way you used the kaleidoscope image as background label for the image. TFS. Wishing you a speedy recovery sweetie.
ReplyDelete