Tuesday, September 28, 2010
Scrappy Halloween cards
Imagine one more great idea!
Sunday, September 26, 2010
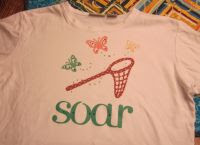
Imagine renewing t-shirts....
Until next time, sort the scraps and generate the gems!
Saturday, September 25, 2010
Imagine texture...
One comment that I've heard repeatedly is that the Imagine cuts are flat, without texture. While on my weekly shopping trip I decided that I had to experiment. So, I purchased 1 sheet of Bazzill Basic Diamond and Bazzill Basic Avalanche. I wanted to compare cuts with those two against my Bazzill Basic matte and HP glossy photo paper. I used two patterns from Imagine more, 2 machine RGB colors and 2 Imagine More RGB colors; paper setting was on "matte".
# 1 is the Diamond. It is highly textured. It reminds me of linen. The colors seem lighter, perhaps muted by the paper' sheen. The pattern paper was less clear (but my sample squares are 1 1/2"!).
#2 is the Avalanche. It is softly textured, like rice paper. The colors are bright and the patterns reasonably clear.
#3 is the basic matter. Colors are clear, the patterns are clear.
#4 is the photo paper. Patterns are very clear and the colors are bright. It really is a whole different look due to the glossy texture.
I can only Imagine what using textured papers will add to using this machine! What do you think?
Thursday, September 23, 2010
Imagine....
I found this great video on You Tube, confirming that I could indeed do some of the things I thought I should be able to do, like creating a stamped sentiment with my I!
(I tried to embed the video without success, so here is the link:)
http://www.youtube.com/watch?v=2mHU3KiTjMA
I had to try her ideas. May first card is created from a K&C Designer pad gifted to me by my Circle Pal, Miz Esther. (She's a gem!) I wanted something to coordinate, but different. So, I created the yellow layer on the I using a digital paper on Imagine More. I then cut it to the correct size with my paper cutter. The picture is a digital stamp from Squiggle Fly, colored with Copics (Thank, you Miz Esther!)
The absolute most amazing part is the sentiment. I used a sentiment from Simply Charming, filled it with one of the standard RGB colors coordinating with Imagine More. I used my cutter to cut the strip to fit.
Isn't that cool! I am sooooo excited! But wait! There's more.
I discovered that I have a wedding to go to this weekend. The card is made from Lacy Labels. I thought the red and black was elegant! I embossed the background on my Cuttlebug using Swiss Dots. All edges are inked in Silver. I didn't have the colors of paper that I wanted and my Imagine came to my rescue! This machine will be wonderful for 2 AM projects. I added some bling with my I-rock.
Take a good look at the inside of the black border. This is the inside of the card with its sentiment:
I wasted nothing. This is the inside cut from the border. I simply repositioned the block at the upper left corner of the mat and followed the video directions. This sentiment is also from Lacy Labels....just filled in and printed.
These scraps will definitely generate many gems! I Imagine tomorrow will bring more gems, too!
Saturday, September 18, 2010
Trying to Imagine what I can do….
My Imagine came Friday! It was so exciting especially since I didn’t think it would be here before the 24th. So, today was Imagine day. I learn best by setting a goal for myself. Today’s goal was to see how much I could do with one imagine cart’s digital papers. This is how it went:
I wanted to use Lacy Labels from my Circle Pal, Miz Esther. I love postcard type greeting cards and the cart fit the bill. I chose my cuts, filled them with patterns from Imagine More (I think) and went to town. I LOVE this machine! First, I only had to place one piece of paper and this is what I got:
I looked funny, I thought, that was until I separated the cuts. I couldn’t have been happier! Here are my first projects:
These cards are about 3” high…not very big and the cuts were perfect! Look at this one:
The lettering is tiny! And the music background is totally proportional.
I’ve wanted to try layering since I first heard about this machine. The cuts and papers are from Best Friends and the lettering is from Lyrical Letters.
The chair is dimensional and the arm comes out to welcome you in! Finally, I had to try Three Birds with the papers from Best Friends. I think it worked.
I was most excited with the numbers of papers that I used and I never once had to go buy anything more. Wonderful!!!! My scraps are now becoming pieces of white paper….and they still help me generate gems – I can only Imagine how!
Sunday, September 12, 2010
Challenges...
This weekend was "All for Fall." Originally, I wasn't going to take part. But today's events compelled me into the challenge. Someone very special had great news and I was lucky enough to share it with her! And this card was the result:
The whole event (including making the card) took about an hour! The papers were from my stash, most probablly Recollections. The leaves, cut in Recollection's Precious Metal paper, cut from the new Thanksgiving Cart as is the card. The font is found on Lyrical Letters. The embossing is a Cuttlebug folder. All was welded and designed in my little Rosie G.
The sentiment reads, "is sharing this season of your life with you! Congratulations!
My challenge to you: Fall into fall beautifully. Sort through the scraps and generate some gems celebrating this season in your life!
Saturday, September 11, 2010
Circle around!
Wednesday, September 8, 2010
Getting to Know Rosie G with Gypsy Basics!
I love it when Rosie G. and I can spend a quiet evening together getting to know one another better. I know that there are many of you learning to love your little Gypsy. So, Rosie and I decided to help you along! Let’s all get down and get back to basics!
Tonight, we made a border. Pretty simple, true, but it makes good use of many features that make Gypsy wonderful!
This basic border began as a simple cut from Gypsy Wanderings. Here’s what we did:
- Tap the “Advanced Menu” and select copy and paste. Do this one time.
- Tap the “Basic Menu” tab and position the two sections.
- Select the original border section.
- Note the “Y” and “X” position numbers. Write them down. (I had X = 1.88 and Y = 6.06.)
- Highlight the pasted border section. Tap the “Y” position. It will turn yellow.
- Use the arrows and move the section to “Y” position 6.06. (It will most probably be the down arrow!)
- Now use the left arrow to overlap the two sections slightly.
- Join the two sections.
- Select one section of the border. Take care not to shift its position.
- Tap on the “Join” button. It will turn yellow.
- Select the other section of the border. Tap the “Join” button it will turn white.
- Your sections are joined.
- Weld the sections.
- Tap on the “Advanced” Tab.
- Be sure the entire border is highlighted.
- Hold the upper right silver button and tap to zoom.
- Select the “Weld” button.
- It will turn yellow.
- Tap the “Eye.” The cutting line will turn red.
- Deselect the “Eye.”
That is half the border. Now, all you do is select the welded/joined sections. Copy them and position them. Finally, join and weld together! The opportunities are endless for what you can create with these basic functions!
Until next time, sort through the scraps and generate the gems!
Monday, September 6, 2010
Links to Gypsy Stamps, too!
http://shesasassylady.blogspot.com/2010/08/gypsy-stamps-too.html
I always say, when life hands you scraps....
Here is a picture of the Christmas tag that I wanted to post with directions. It was for a CMB challenge and was great fun! It is mostly from "Winter Frolic," but the snowflake is from "Christmas." The little girl is created with my technique, "Gyspy Stamps." I will be updating this blog with that instructional link within the week.
Until next time, thank you for bearing with me. And always remember: take the time to sort the scraps and to generate the gems!


